How To Replace A Serpentine Belt In An Altima
Your Nissan's serpentine belt is essential to keeping your car running. Like replacing the camshaft position sensor, replacing a worn out serpentine belt is an important way to maintain your Nissan. If you need a comprehensive guide on how to replace a worn serpentine belt in a Nissan Altima, you came to the right place.
We'll walk you through the process.
1. Order A New Serpentine Belt

To replace the old serpentine belt, you’re going to need a new one. Each OEM Nissan serpentine belt is designed to fit a specific engine (or a specific set of engines). That's why it's a good idea to look up your Nissan model in our catalog of OEM serpentine belts. You'll get the right part number that will fit your specific model year. For example, OEM serpentine belt part #11720-JA10B is built for the 2007-2014 Nissan Altima with the 3.5L V6 engine.
2. Remove the Old Serpentine Belt
Once you have the new belt in hand, the next step is to remove the old one. The following set of instructions will show you how to remove the serpentine belt on your Altima.
- Loosen the 21mm lug nuts on the passenger side wheel.
- Jack up the car and put it on jack stands.
- Remove the wheel fully.
- Remove the plastic shielding behind the wheel to gain access to the lower part of the belt. (Pull on the center of the plastic push clips to remove them)
- Using a 14mm socket, loosen the pulley tensioner bolt by rotating it clockwise. (This removes the tension from the belt)
- Slide the belt off of the pulleys.
- Compare the old and new belt to ensure that the length is the same, the width is the same, and the number and spacing of ribs are the same.
Pro tip: If you want the replacement process to go smoothly, use a serpentine belt tool kit.
3. Install the New Serpentine Belt
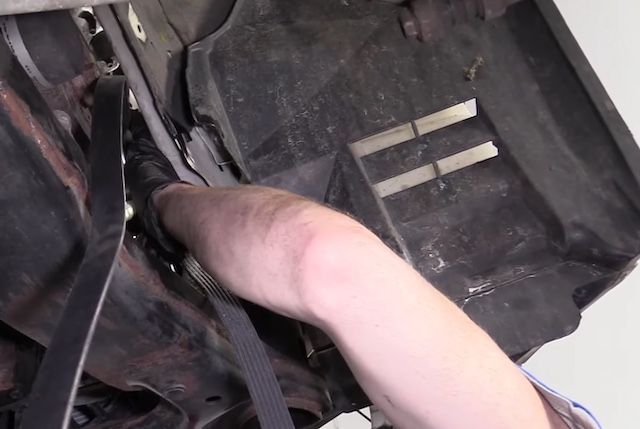
Image Credit: 1A Auto
Now that the old belt is out of the way, it's time to install the new serpentine belt. The installation process is the opposite of the removal process. Yet, sliding a serpentine belt back onto an engine can be tricky. That's why the steps below are listed in an order that should make this job as easy as possible.
- Slide the belt onto the pulleys in the following order, or as shown on the serpentine belt diagram: 1.Alternator pulley 2. Water pump pulley 3. Power steering pulley 4. Belt tensioner 5. A/C compressor pulley
- Put your 14mm socket back on the belt tensioner bolt and loosen the tension again
- Slide the belt over the harmonic balancer
- Re-tension the belt and then remove your 14mm socket
- Check all the pulleys to make sure the belt is fully seated in the grooves.
- Start the engine for 10-20 seconds and then watch the new belt spin to make sure the belt is installed the right way
- Reattach the plastic shielding in the wheel well
- Reinstall the wheel
- Lower the vehicle back to the ground
- Tighten and torque your wheel lug nuts to factory specs
Important note: While pulling the belt onto the pulleys, remember that the surface of the belt and pulley should match. This means the ribbed pulleys should come into contact with the ribbed side of the belt. The smooth pulleys should come into contact with the smooth side of the belt.
If you have any questions about this process or what parts are needed to fix your Altima, feel free to contact us. We're more than happy to assist you.