How To Replace A Nissan Ball Joint
Ball joints are designed to last a long time. However, their longevity depends on several factors, including the conditions they operate under, vehicle mileage, and even how well they are maintained.
Occasionally, ball joints start to go bad and eventually fail. When this happens, you can take your Nissan vehicle to a mechanic or do the work yourself. That's where this guide comes in – here, we'll show you how to replace a ball joint, including tips and tools for the job.
This guide will help you replace a ball joint on most Nissan cars, trucks, and SUVs. However, if you'd like to know more about ball joints, check out this article explaining what a ball joint is and why it's important.
Tools Needed To Replace A Ball Joint
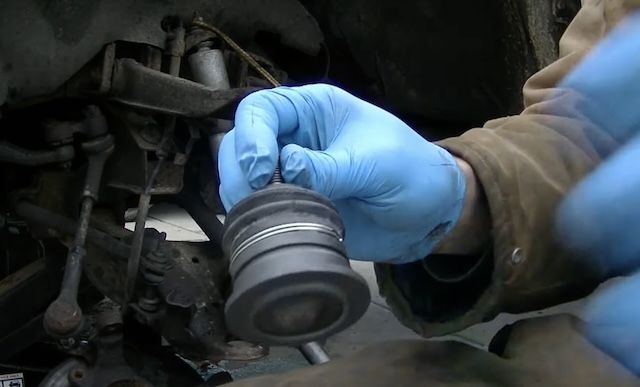
Image Credit: 3DMachines
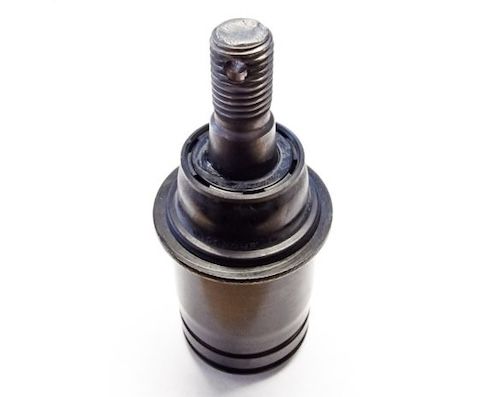
To get started, you'll need the following tools in addition to the new OEM Nissan ball joint:
- Floor jack/Jack Stands
- Wheel chocks
- Ball joint separator or pry bar or ball joint press
- Hammer
- Cold chisel
- Ratchet wrench and sockets
- Pliers
- Penetrating oil
- Safety goggles and Nitrile or mechanic's gloves
How To Replace The Ball Joint
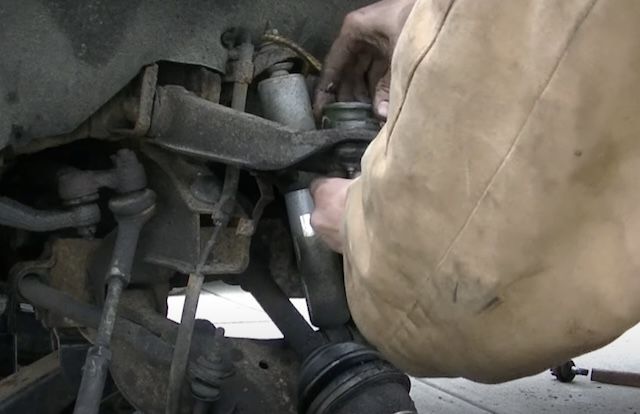
Image Credit: 3DMachines
It's a good idea to park your Nissan on a flat spot, preferably in a garage or driveway, off the street. Use the floor jack with the jack stands to secure your vehicle when it's off the ground. Before attempting removal, soak the parts in penetrating oil and let it sit for about 20 minutes. Also, clean the suspension arms and area around the ball joint with a wire brush before installing the new part. Additionally, it's a good idea to replace both ball joints at the same time. If one ball joint is failing, the other one is likely on its way to failing, too.
Removing The Old Ball Joint
- Set the parking brake and use wheel chocks to secure the vehicle.
- Loosen the lug nuts on the wheel.
- Raise the vehicle with the floor jack and support it with jack stands.
- Remove the tire and wheel assembly.
- Remove the lower ball joint pinch bolt. To get it to come loose, you may need to soak it in penetrating oil, use an impact wrench, or tap it with a cold chisel.
- Use the ball joint separator or pry bar to separate the ball joint and control arm from the wheel assembly.
- Use a hammer and cold chisel to tap the snap ring loose and pry it off. You can also use a pair of snap ring pliers and a flathead screwdriver to remove the snap ring.
- Carefully pry the old ball joint loose from the control arm with the pry bar or ball joint separator. If you are unable to pry the ball joint loose, you may need to use a ball joint press.
Installing The New Ball Joint
- Install the new ball joint in the lower control arm with a new snap ring.
- Install the ball joint pinch bolt, connecting the lower control arm to the wheel assembly.
- Reinstall the tire and wheel assembly.
- Lower the vehicle and remove the wheel chocks.
Once you've completed the job of replacing the ball joint(s), take your Nissan for a test drive the vehicle to verify the repairs.
Why Choose Nissan Parts Plus?
If you need ball joints or any other part for your Nissan car or truck, you can save a lot of money at NissanPartsPlus.com. We only sell genuine OEM replacement parts for most Nissan models at wholesale prices.
If you have questions or need help ordering parts, please contact us. We'll help you find the right part and answer any of your questions.